Private clinics in London operate in a competitive marketplace. Patients have options. They’re comparing you online before they ever call. Your website isn’t a brochure anymore—it’s your most important sales team member.
Here’s the problem: Most clinic websites fail at the most critical moment. A patient lands on your site, interested in booking an appointment, and then… they leave. No form filled. No call made. No appointment scheduled.
Why? Because they don’t trust you enough yet. They haven’t seen your credentials. They don’t know if you’re experienced. They haven’t read what other patients say about you. The trust barrier is still there.
This guide gives you the complete checklist for building a clinic website in London that doesn’t just look professional—it actively converts visitors into paying patients. We’ll cover everything from trust elements to conversion mechanics. You’ll know exactly what your website needs to include, in what order, and why.
What Makes a High-Converting Clinic Website Different
A high-converting clinic website does three things simultaneously: it builds trust, it answers questions, and it removes friction from the booking process.
Most clinic websites excel at one of these. Great ones master all three.
Here’s the distinction: A standard clinic website tells visitors *what* you do. A converting clinic website tells them *why* they should trust you, *what* their experience will be, and *how* to get started today. It addresses the specific psychological barriers that stop patients from booking.
In London particularly, where private clinic options are abundant, trust is the differentiator. Patients want to know: Are you qualified? Are you experienced? Will you listen to me? Will my data be safe? How much will it cost? Can I get an appointment quickly?
Your website must answer all of these questions before the patient ever speaks to a receptionist.
The conversion framework differs too. A converting clinic website removes what we call “friction points”—the extra steps, missing information, or unclear processes that make booking harder than it needs to be. A patient shouldn’t have to guess how to book an appointment. They shouldn’t need to call to find out prices. They shouldn’t wonder if their data is secure.
Every element of your site—from your homepage hero section to your payment policies page—should serve one of three purposes: building trust, removing friction, or moving the patient toward booking.
The 12-Point Trust Checklist for London Clinic Websites
Trust isn’t built through empty claims. It’s built through tangible proof. Your website must demonstrate credibility through specific, verifiable elements. Here are the 12 non-negotiable trust signals:
1. Clinician Biographies and Credentials
Your clinicians are your credibility. Every clinician who sees patients needs a dedicated biography page or section. This isn’t a one-liner. Include: full name, professional qualifications, years of experience, specialist areas, professional affiliations, and a professional photo.
Patients want to know *who* they’re seeing. They want to verify credentials. They want to feel confident. A paragraph describing “Dr. Sarah Mitchell, with 15 years of experience in cosmetic dermatology and memberships with the RCGP and GMC” is infinitely more powerful than “experienced doctor.”
Include specific achievements too. Did your clinician train at a prestigious institution? Have they published research? Do they attend regular professional development? These details matter enormously to patients doing their homework online.
2. Patient Testimonials and Reviews
Social proof is the most powerful trust signal available. A new patient will believe another patient’s experience far more readily than your own marketing claims.
You need at least 10-15 genuine patient testimonials visible on your website. These should include: patient name (or “John P.”), their condition or treatment they received, specific details about their experience, and ideally a star rating. Video testimonials are even more powerful—a real person on camera talking about their experience builds trust almost instantly.
Where should testimonials live? Your homepage should feature 2-3 prominent ones. Your services pages should include testimonials from people who received that specific treatment. You should also integrate your Google Business Profile reviews directly into your site.
The key word here is “genuine.” Fabricated testimonials damage trust irreparably if discovered. Only feature real reviews from real patients (with permission).
3. Privacy Policy and Data Protection
Patients share sensitive health information with you. They’re rightfully cautious about data security. A clear, comprehensive privacy policy isn’t optional—it’s essential for both legal compliance and patient trust.
Your privacy policy should clearly explain: what data you collect, how you use it, how long you retain it, how it’s protected, patient rights under GDPR, and how patients can request their data. Don’t hide this in tiny text at the bottom of the page. Make it easily accessible and readable.
Many clinics add a dedicated “Privacy & Security” section or page that explains your specific security measures—encrypted data storage, secure appointment systems, restricted staff access, regular security audits, etc. This transparency builds confidence.
4. Professional Certifications and Regulatory Compliance
Display all relevant certifications prominently. This might include: GMC registration, CQC ratings, professional liability insurance, health and safety compliance, and industry-specific certifications.
For clinics in London, patients want to see proof that you’re regulated and compliant. Include regulatory body logos (with links to verification if possible). If you’ve received specific accreditations or awards, display them. If your clinic has excellent CQC ratings, make this visible throughout your site.
A simple “Registered with the GMC” statement should appear on your homepage, your About page, and in your clinician biographies.
5. Transparent Pricing
Nothing damages trust faster than hidden costs. Your patients shouldn’t need to call for a price quote.
You don’t necessarily need to publish exact prices for every treatment (some variable treatments require consultation), but you should provide price ranges. For standard treatments, publish exact prices.
Create a dedicated pricing page or include pricing in each service description. Be transparent about what’s included, what extra costs might apply, and what insurance or payment plans you accept.
Better yet, offer an upfront cost calculator or consultation booking where you confirm pricing before the appointment. This removes the fear of unexpected expenses.
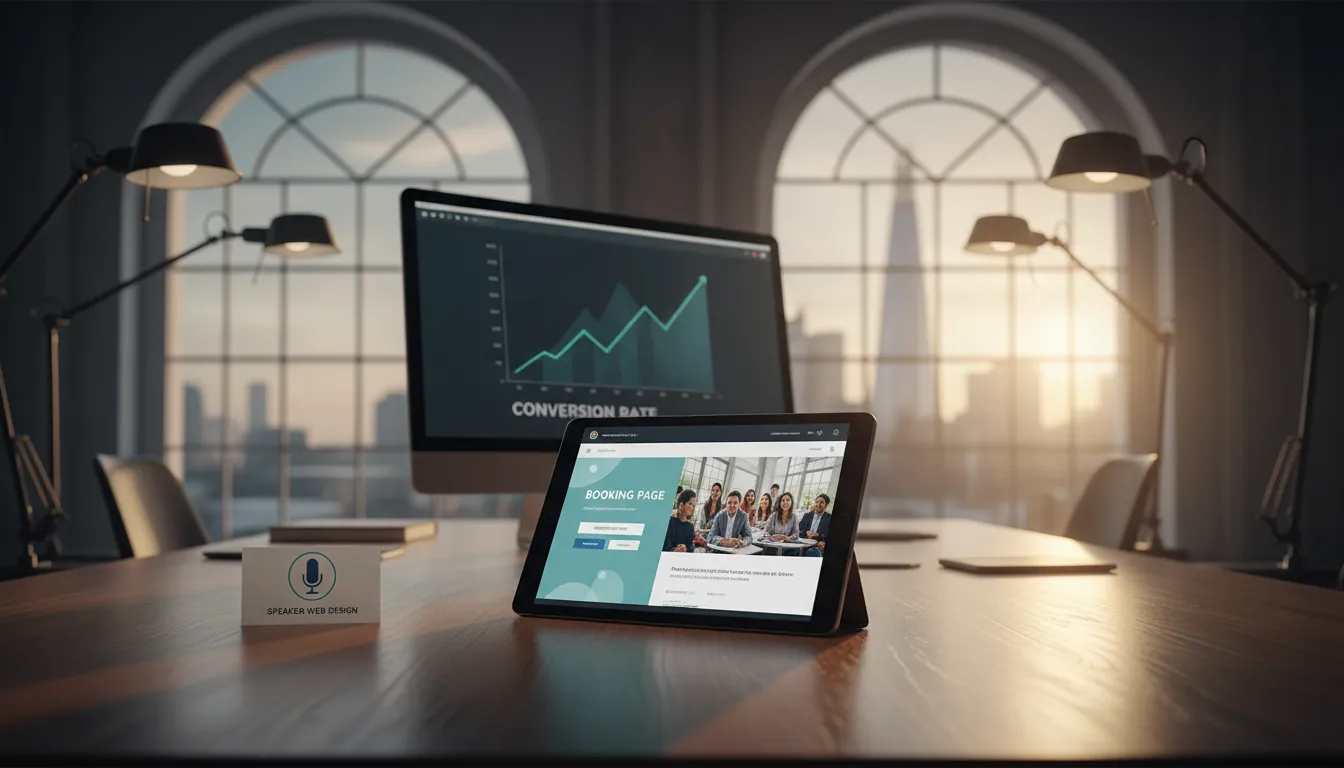
6. Clear Appointment Booking System
The pathway to booking must be frictionless. Whether you use an online booking system or phone appointments, make it obvious and easy.
If you have online booking, the “Book Now” or “Schedule Appointment” button should be visible on every page—ideally in the header and hero section. The booking system should be simple (not asking for unnecessary information), secure, and mobile-friendly.
If you take phone appointments, your phone number should be prominently displayed and easily clickable on mobile devices.
Better clinics offer both: online booking for routine appointments and phone booking for consultations where pricing or treatment options need discussion.
7. Clinician Photos and Video
Patients want to see who they’re going to meet. Professional headshots for every clinician are non-negotiable. These should be high-quality, recent, and consistent in style.
Even better: include short video introductions from your clinicians. A 30-60 second video of your doctor introducing themselves, explaining their approach, or discussing their specialty builds immediate connection and trust.
8. Detailed Service Descriptions
Patients want to understand what each treatment involves before booking. Service pages should include: a clear explanation of the treatment, what to expect before/during/after, potential benefits and risks, recovery time, and pricing.
Avoid medical jargon without explanation. Explain things as you would to a patient sitting in your office. Answer the questions patients actually ask during consultations.
Include before-and-after photos where relevant (with patient consent and privacy). For procedures, consider including a step-by-step explanation or infographic showing what happens during treatment.
9. Response Time and Availability
Include clear information about when patients can expect responses. State your typical response time for inquiries. If you offer next-day or same-day appointments for emergencies, say so.
Patients are anxious. They want to know they’ll hear back from you soon. A statement like “We respond to all inquiries within 4 business hours” or “Same-day appointments available for acute conditions” builds confidence.
10. FAQ Section Addressing Common Concerns
Create a comprehensive FAQ addressing the questions you hear repeatedly: How long does the treatment take? Is it painful? How long until I see results? Do you accept my insurance? Can I have a consultation before booking?
FAQs serve dual purposes: they build trust by showing you understand patient concerns, and they improve your SEO by answering common search queries.
11. Professional Imagery and Branding
The visual quality of your clinic website communicates professionalism. This means:
– Professional photography of your clinic (not stock photos that look generic)
– Consistent color scheme and typography reflecting your brand
– High-quality graphics and icons
– Mobile-responsive design that looks great on all devices
– Fast loading speeds
Your visual identity should feel clinical but warm, professional but approachable.
12. Contact Information and Location Details
Make it ridiculously easy to contact you. Include: phone number, email address, physical address, hours of operation, parking information, public transport directions, and an embedded Google Map.
All of this should be visible on every page (in the footer at minimum). Contact details shouldn’t require clicking to a different page.
Step-by-Step: Building Your Clinic Website Conversion Path
Converting a website visitor into a booked appointment follows a predictable psychological journey. Your site must guide patients through each stage.
Stage 1: Awareness and Immediate Trust (Homepage and First Impression)
The patient lands on your homepage with a question: “Is this the right clinic for me?” You have roughly 3 seconds to answer affirmatively.
Your homepage hero section should immediately communicate: who you are, what you specialize in, and why they should trust you. This typically includes a compelling headline, subheading, hero image, and primary CTA (usually “Book Appointment” or “Schedule Consultation”).
Follow the hero with your strongest trust signals. This is where patient testimonials, clinician credentials, and key statistics belong. Show that you’re experienced, trusted, and professional.
Then, introduce your main services. Don’t overwhelm—feature 3-5 core services with brief descriptions and CTAs. The goal is showing breadth while pointing patients toward what they need.
Finally, include a section addressing common questions or objections. This might be “Why Choose [Your Clinic]?” or “What Our Patients Say” with testimonials.
Stage 2: Consideration and Information Gathering (Service Pages)
Once a patient identifies their potential treatment, they navigate to that specific service page. Here, they’re in research mode. They want to understand what the treatment involves, what results to expect, how much it costs, and whether it’s right for them.
Each service page should follow this structure:
– Clear, benefit-driven headline (not just the treatment name)
– What it is (brief explanation in plain English)
– Who it’s for (who benefits most from this treatment)
– What to expect (before, during, after)
– Results and timeline
– Pricing and options
– Before-and-after photos (if applicable)
– Patient testimonials for this specific treatment
– FAQ specific to this treatment
– Strong CTA: “Book Your Consultation” or “Get Your Free Assessment”
This comprehensive approach answers questions before patients need to ask, building confidence and trust.
Stage 3: Decision Making (About Page and Clinician Profiles)
At this stage, patients are nearly ready to book but want one final reassurance: Are the people at this clinic qualified and experienced?
Your About page should tell your clinic’s story. Why was it founded? What’s your philosophy? What makes you different? Then introduce your team with full bios and credentials.
Your clinician profile pages should be detailed. Include full credentials, specific expertise, years in practice, professional affiliations, areas of special interest, and a personal statement about their approach to patient care.
This is where patients build personal confidence in the specific clinician who’ll be treating them.
Stage 4: Action (Booking Page and CTA)
By this stage, the patient is ready to book. Make this step effortless.
Your booking page or system should:
– Clearly show available appointment times
– Offer appointment type choices (consultation vs. treatment vs. follow-up)
– Require minimal information at booking (name, contact, appointment preference)
– Confirm appointment details immediately
– Send a confirmation email with reminders
– Offer to answer any final questions before the appointment
The frictionless booking experience can increase conversion by 30-40% compared to requiring phone booking or form submission.
Building Trust Through Transparency on Key Pages
Beyond the primary conversion path, certain pages specifically address trust concerns. These pages don’t directly drive bookings but support them by removing doubt.
Pricing Page
Create a dedicated pricing page that lists your treatments with pricing (or price ranges for variable treatments). Explain what’s included, what additional costs might apply, what payment methods you accept, and any financing options.
Transparency about cost removes a major barrier. Patients would rather see prices they can’t afford and self-select out than feel deceived about costs later.
Policies Page
Include clear cancellation policies, refund policies, and what patients should know before their appointment. This clarity prevents misunderstandings and builds trust that you’re straightforward in your dealings.
Insurance and Payment Page
State clearly which insurance companies you work with. If you offer payment plans or financing, explain how they work. If you accept credit cards, show the logos. Patients want to know you accept their preferred payment method.
FAQ Page
Beyond treatment-specific FAQs, create a general FAQ addressing: How do you protect patient privacy? How are clinicians qualified? How often should I have appointments? What if I’m not satisfied? What’s your cancellation policy?
Visual Design Principles That Build Clinic Credibility
The design of your website communicates professionalism before any words are read. Here are the key visual principles for clinic websites:
Color Psychology
Clinical websites typically use blues, greens, and neutrals. Blue conveys trust and professionalism. Green conveys health and growth. Neutrals (whites, grays) provide clean, clinical atmosphere. Avoid bright, playful colors that undermine medical credibility.
Typography
Use professional, readable fonts. Two font families maximum (one for headings, one for body text). Font sizes should be large enough for easy reading, especially for older patients. Aim for 16px minimum for body text.
Whitespace
Clinical websites benefit from generous whitespace. Avoid cluttered layouts. Give elements room to breathe. This creates a sense of calm and professionalism.
Professional Photography
Use professional photos of your clinic, equipment, and team. High-quality photography is worth the investment. It communicates that you care about your appearance and professionalism.
Mobile Responsiveness
Over 60% of clinic website visits are on mobile devices. Your site must look perfect on phones and tablets. Test extensively on real devices.
Loading Speed
Slow websites lose visitors and harm trust. Optimize images, minimize code, and use fast hosting. Target under 3-second load times.
Tools and Resources for Building Your Clinic Website
Website Builders and Platforms
Healthcare-specific platforms like Eleesa or Jane App provide HIPAA-compliant appointment booking and patient management integrated with websites. General platforms like WordPress, Webflow, or Squarespace work well for clinic sites with custom development.
For detailed guidance on platform selection, see our guide on [WordPress Web Design London: When It’s the Best Choice for Your SME](https://wdlon.com/wordpress-web-design-london-when-its-the-best-choice-for-your-sme/).
Appointment and Booking Systems
Systems like Acuity Scheduling, Calendly, or Setmore integrate with your website and handle appointment booking automatically. Healthcare-specific options like Vagaro or Coassemble offer HIPAA compliance.
Review Management
Google Business Profile is essential for local clinics. Trustpilot, Healthgrades, and ZocDoc allow patients to leave and find reviews. Integrate these into your website.
Email Marketing
Mailchimp, ConvertKit, or HubSpot allow you